Monday, September 24, 2012

[Hackintosh] Dual Boot on Windows 7 and Mountain Lion


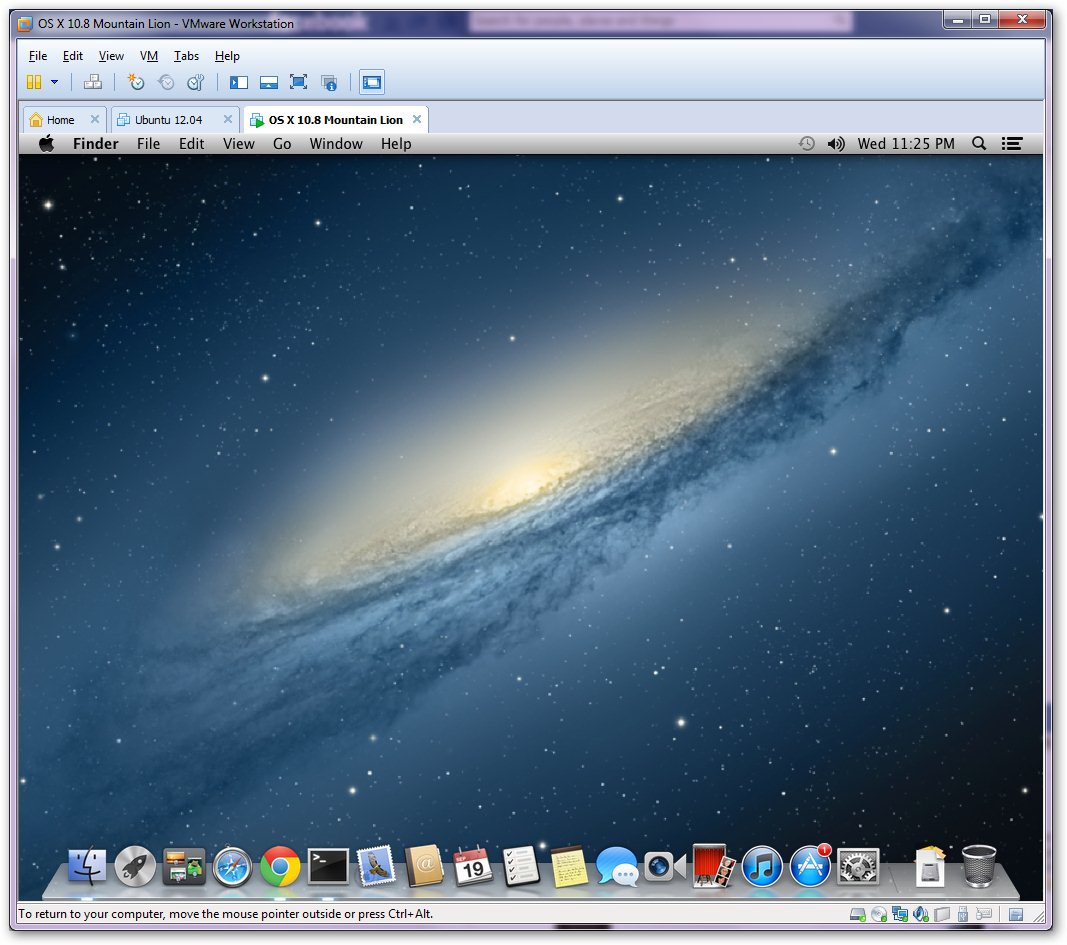
Since I used Hackintosh on VMware, I got shocked by this amazing system. Therefore, I tried to install Mountain Lion on my PC.

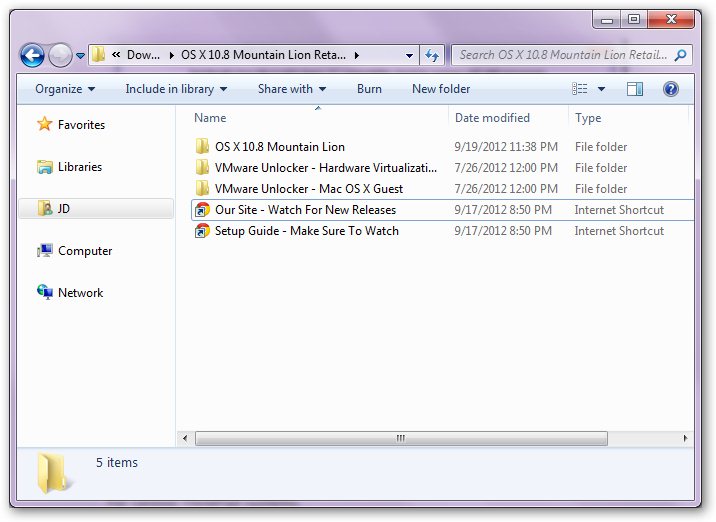
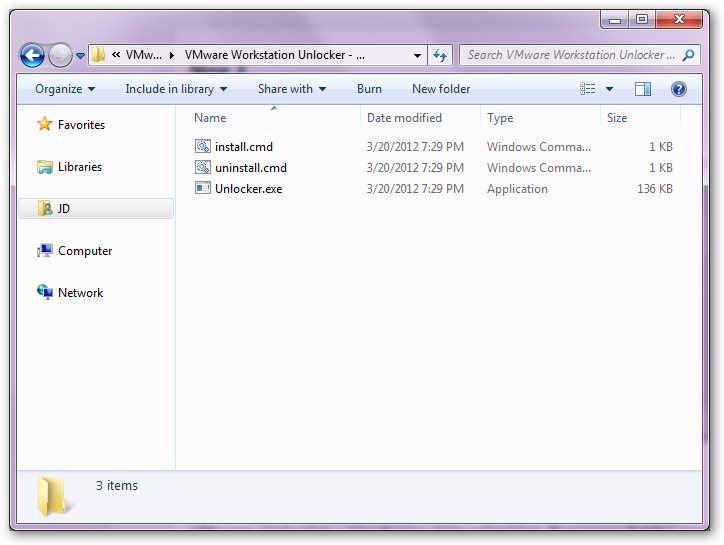
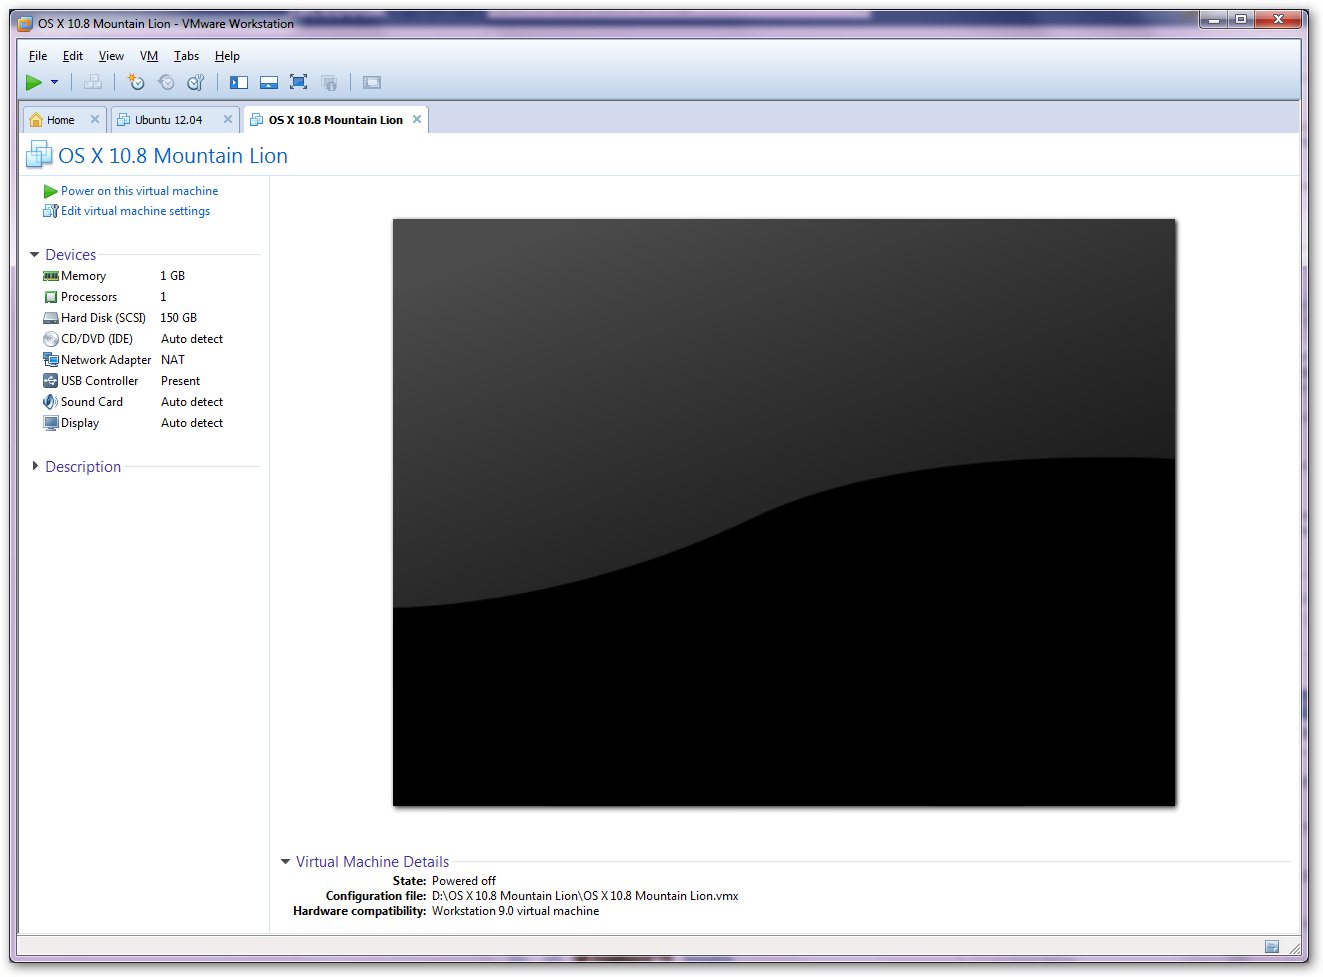
I followed these guide to complete my installation:

Yet, I encountered some problems here.

1. Screen hanged at apple logo after installing VoodooHDA.
Solution:
  • Download DisablerAppleHDA.kext from here. 
  • Install with Kext Utility.
  • Open MultiBeast and install VoodooHDA for VIA 2021

2. Continuous spinning at apple logo after upgrade to 10.8.2
Solution:
  • Download AppleACPIPlatform.kext.zip
  • Login to Mountain Lion via -x safe mode.
  • Replace the kext file using Kext Utility
  • Reboot and you are done.

3. USB3.0 and PS/2 Controller in MultiBeast couldn't install
Description: After getting these options ticked in MultiBeast, Mac stuck at apple logo after this reboot and unable to get into desktop even in -x safe mode. Any suggestion?

4. Need USB to multiboot
Description: Still can't find a way to do dual boot without USB, tried a lot of methods but still fail, any suggestion too?

Basically, my Hackintosh works great. Just these two issues unsolved. If any of you can help, I would be appreciated.


Thursday, September 20, 2012

Mac OS X 10.8 Mountain Lion on Vmware Workstation 9


Owning a Macbook or Apple product is always my dream. I dreamt on it, yet it is way too expensive for a student like me. Therefore, Hackintosh is a perfect solution for me.

Here, I am going to go through the steps of installing Mountain Lion on VM. It is an easy task.

You have to prepare these to start your work.
  • Hackintosh Compatible Hardware    You must have an Intel CPU which has virtualization enabled.
      (You will get a guide on enable it on below.)
  • installed VMware Workstation 9    This is the platform I will go through.
      (VMware player works as well.)
  • OS X 10.8 Mountain Lion Retail VMware Image    From your favourite place.
  • VMsvga2_v1.2.3.pkg
      This is use for Mac display.

Now, let's go!


Step 1
Restart your computer and enter your bios.
Navigate to Advance Bios Feature and look for Virtualization Technology.
Enable it and you are done.


Step 2
Extract OS X 10.8 Mountain Lion Retail VMware Image.7z file.
You will get to see three folder.


OS X 10.8 Mountain Lion folder contains the image file.

VMware Unlocker - Hardware Virtualization Bypasser folder contains file that help you pass the restriction for VMware if your machine does not support Virtualization technology. (Most of us wouldn't use this.)

VMware Unlocker - Mac OS X Guest folder contains file to unlock Mac OS X Operating System in VMware workstation.


Step 3
Completely close your VMware Workstation. 
Execute install.cmd in VMware Unlocker – Mac OS X Guest -> VMware 8.x Series -> VMware Workstation Unlocker - Windows folder.
Make sure to run it as administrator for it to work.


Step 4
Start your VMware Workstation. Go to File ->Open and Navigate to OS X 10.8 Mountain Lion.vmx and open it.


Then click Edit virtual machine settings to configure it.


Adjust your memory to at least 2GB and your processor to 2 cores as well as accelerate 3D graphics to provide a smooth environment.


Then, navigate to the Options tab to configure the operating system to Apple Mac OS X and version to Mac OS X 10.8 64-bit. This shows up after you successfully installed the install.cmd in step 3.


Step 5
Power on this virtual machine and follow the on-screen solution to set up your operating system.


After all sorts of clicking next and a few minutes of time, you finally succeed in login to Mountain Lion. Congratulations! But this is still not the end.


Step 6
You have to install VMware tools to have a better experience. So, we navigate to folder VMware Unlocker - Mac OS X Guest -> VMware 8.x Series -> Tools and mount darwin.iso.


Now, let's try to install VMware tools in Mountain Lion.


You probably will encounter error on finishing the installation.

But never mind, it is actually "installed". You can find it out after you restart your system.


Step 7
Now, you might encounter screen flickering while opening launchpad now. No worries, I got your back. Copy the VMsvga2_v1.2.3.pkg into Mountain Lion and runs it.

Here, you got yourself ready a HOT pancake!


You got no glitches now for your brand new Mountain Lion.


The Graphics here shows that you are currently using VMware SVGA II 128MB. It is the display to use with Mac OS after you successfully installed VMsvga2_v1.2.3.pkg.

Note 1. VMware couldn't detect your display card. It will only give your virtual machine a maximum of 128MB nVRAM. It is not really compatible with Mac OS, so we installed VMsvga2_v1.2.3.pkg.

and now

CONGRATULATIONS!

You can show off your hackintosh to your friends now.
It is just as smooth as real Mac with my current computer specifications. Just some lagging while launching the launchpad. This is not a real BIG deal.


Feel free to ask me any questions or give me any advice to make me better. Thank you.


Wednesday, September 19, 2012

Intro


Hello there, I am Jaden. I came from Malaysia and now study in Taiwan.

First of all, I would like to introduce this blog. This will be a blog of my learning path in any kind of technology. I took this as my public note.

Below are my specs of my pc
===================
Processor: Intel Xeon E3 1230 v2
Motherboard: Gigabyte H77-D3H
Graphic Card: GV-N560OC-1GI
Memory Card: Kingston DDR3 1600 8GB * 2
Harddisk: WD10EALX
Power Supply: Seasonic S1SII
Casing: CM Storm Enforcer

I will be using Ubuntu, Mountain Lion and Windows 7.

Feel free to ask me something or teach me something. I would really be appreciate.